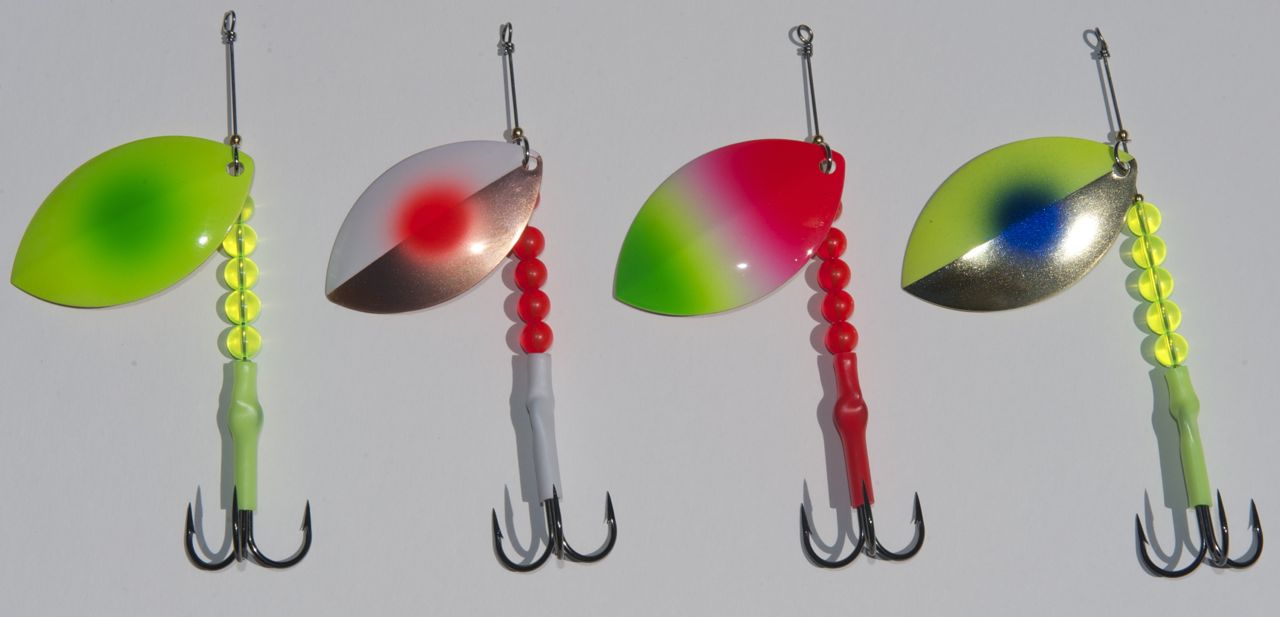
A lot of what I have learned about fishing comes from watching professionals like Cody Herman with Day One Outdoors.
This post from Cody’s Day One Outdoors blog has taught me the basics of making my own spinners. To my surprise, some of my spinners have actually caught fish. 🙂
I would like to get this information out there to my followers so you too can start making your own custom spinners and catching more fish.
Salmon Spinner Making 101
Parts:
.030 – .040 wire
10 or 20 Treble Hooks
8mm round plastic beads
6mm round plastic beads
Metal Bearing bead
4 Clevis
5, 6 or 7 Cascade Blade
Colored Tubing
Tools:
1 Pair of Needle Nose Pliers
Fishing for salmon takes on many forms. From utilizing bait to hardware, an angler has a multitude of options to target salmon and generate the flight or fight reaction that comes in the form of a bite. As anglers, we strive for that moment.
Spinners are a fantastic lure to use to target spring and fall salmon alike. From trolling to sitting on anchor and casting, spinners give off a powerful vibration that Salmon find hard to resist.
As you will hear me say in all of my blogs as well as on Outdoor GPS TV, you must follow three rules to catch fish.
1) Location: We all know the saying 10 of the fishermen catch 90 of the fishthat is because 90 of the fish are in 10 of the water. If you are not in the fish, you will never be able to illicit a bite.
2) Presentation: Determining if the fish wants a fast moving bait, hardware trolled, backbounced eggs, on anchor stagnant presentation or anything in-between is important. If you are downhill trolling, and dont get bit but the anchor boats are, change your presentation. This also includes lure choice. A herring, Spinner, Kwikfish and eggs all give off different vibrations and looks for the fish. Listen to what they want.
3) ColorScents: Once the first two steps have been dialed in, then you can begin to change colors and add scents. My opinion is that changing anything from your original plan at the beginning of the day is pointless unless the first two steps have been answered.
Now, back to building spinners

This first picture shows a general box of pieces you will need to start building a spinner. Start with a piece of .030-.040 sized wire in a 10-inch section. Needle nose pliers will be used to bend the wire.

Choose a spinner blade in Size 6 to 7 Cascade and a 4 clevis for this type of trollinganchor spinner. Next select 4 8mm beads, one 6mm bead and a metal bearing bead in the color combination of your choice.

First, use your needle nose pliers to make a 45-degree bend away from the centerline of the wire. Grip the bended piece of wire with the pliers and curl the tag end of the wire around the pliers themselves to create a circle. Next place the Tubing color of your choice over the shank of the hook. Then put the hook inside the looped wire that you have just created. Pinch the loop with your pliers and grab the tag end of wire with your other hand to twist the wire around the main wire. Trim the wire so it is flush with the main shaft. Make sure that your loop is PERFECTLY inline with the main shaft. This will ensure that your spinner does not wobble and spins straight.

Next, pull the tubing above the hook up onto the wire shaft just above your wraps. If the tubing is difficult to move, warm and soften the tubing by placing it under hot water. Once the tubing is up above the wrapped wire, position the loop in the wire and the loop in hook in an offset manner. This too will assist in the proper spinning of your lure.

Now place first the 4 8mm beads, then the 6mm bead and finally the metal bearing bead onto the main wire shaft from the un-looped end. The metal bearing bead is key to reducing friction and will last several seasons without breaking or grinding down, unlike a plastic bearing bead.

Next put the 4 clevis through your spinner blade and thread the wire through the clevis. Your spinner is now just about complete.

To finish building the spinner, you will need to make another loop in the wire at the top. This is an important part of finishing up your lure. I personally leave a long piece of wire above the clevis. I want the blade of the spinner to be roughly in the middle of the completed wire shaft. This decision is based upon physics. The blades centrifugal force on the wire is constantly trying to throw lure into a wobble. By leaving a long tag end at the top and having the blade in the middle of the shaft in addition to the drag of the spinner working in the current, your spinner will spin more free and not wobble.

Make the same loop now at the top of the spinner and you have finished a fish catching machine! Finally, look down the centerline of the spinner and make sure it is perfectly straight. Now go stick some fish!
This How-To is strictly 101. I will be placing more educational posts in the future regarding colors, rigging, presentations and patterns for spinner fishing over the next few months. Feel free to leave your questions and comments below! Thanks for reading!
– Cody Herman
